
How Exactly Does One Extend A Fish?
My family loves to cruise, namely on the Disney Cruise Line. We’re just two weeks away from cruising to Alaska in fact, and I’ve been busy preparing for the cruise by making fish extender gifts. Now I know for the uninitiated that makes absolutely no sense whatsoever, so let’s start with a little background. Disney Cruise Line naturally combines cruising (basically sailing around in a floating hotel resort), Disney fans and families, something that sets it apart from the other cruise lines. It makes the experience different from other boats and those unique circumstances have led to things you only see on a DCL cruise. One of these things is fish extenders.
Outside every stateroom there’s a little fish emblem that’s used for crew/guest communication. For instance if you have a reservation at the exclusive Palo restaurant (and you should, believe me) the crew will leave you a little envelope on the fish. I don’t know how it started, but guests aboard DCL have been signing up for gift exchanges for years. They use one of the several popular Disney forums or Facebook and agree ahead of time to exchange gifts with a certain number of other guest, usually 8-10 or so. You bring your gifts with you on board and deliver them to the rooms during the cruise. Well, where are you supposed to put them? Some enterprising guest came up with the idea of hanging a little set of fabric pockets on the fish, thereby extending it, get it? Yes, it’s a silly name, and makes no sense to outsiders at all, but it’s caught on big time and you can see dozens of them on every level of the ships on every cruise.

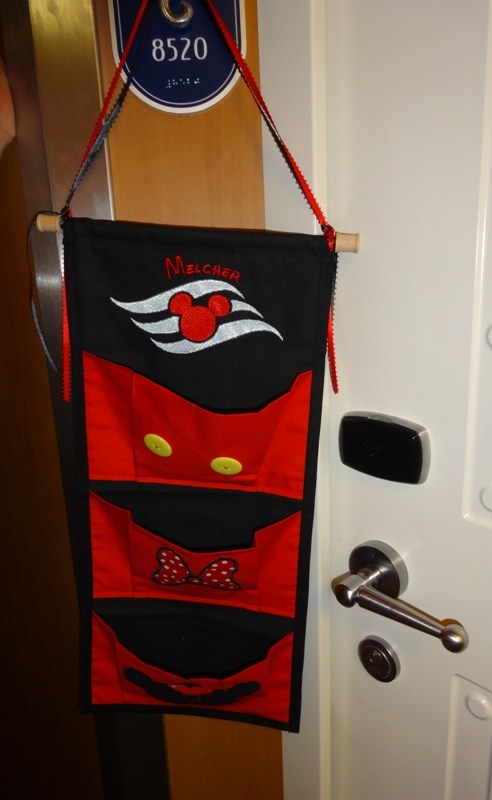
We’ve been participating on nearly every cruise we’ve taken, and it’s been a lot of fun. It’s also been a certain amount of anguish, because we go all out every time, and I can tell you it’s a little disappointing when you get back to your room after dropping off Nightmare Before Christmas illuminated halloween wreaths to find a bag of m&m’s in your extender, but I digress. For this cruise we’re doing our usual thing, with individual bags of multiple items for every guest in the room, and a special item. In the past I’ve made custom LEGO model kits, the previously mentioned wreaths and all manner of fun hand crafted treats. This time around I made half scale replicas of the stateroom door number plaques. I’ve seen these before, either 3D printed or sewn, but I wanted to take it to the next level.
My plan was to design, 3D print, bodyshop and paint them. I started by modeling the plaques in Fusion360. Using reference pictures I shot on our last cruise. It’s a relatively simple model and was completed pretty quickly. I started with a profile sketch and did a revolve to get the basic shape. I then did hole function for both the ring on top (M2 through hole) and the base at the bottom (M2 tap hole), followed by a pattern to get a perfect circle of them.
I imported McMaster Carr screws just to help visualize them. The lettering was a bit more of a challenge. Finding the exact font was difficult, but I eventually tracked it down. Unfortunately I couldn't get Fusion360 to play nice with it, and had to resort to making the numbers in Illustrator and importing an .svg file. Once I had the model made I exported .stl files and brought them into Slic3r to prepare for printing on my Prusa i3 Mk3. I started with a single prototype printed in Hatchbox black PLA. I like to use prototype and iterative design, some say it’s wasteful, but if you learn something on every run, I don’t consider it a waste. I did a quick pass of filler primer and sanding, just enough to get a good idea of the final appearance, before painting and assembly. The numbers were glued on with E6000, which I decided wasn’t the best idea. The ring is attached with eight stainless steel machine screws, tapped right into the plastic. I also glued on four of the magnets I intended to use to make sure they had the holding power we’d need.
I decided to make a few changes to the model based on the prototype (see, it was worth it), I altered the profile slightly, to make them a little deeper, as well as raised the center “puck” a bit. I also added some holes in the back to recess the magnets inside. It was about then I decided that I really didn’t like the blank background on the puck. The real plaques have a compass printed on them, and I knew I just had to figure out a way to make that happen. Then it was time to export and print the batch. Because of their size it was several days of printing.

With all the parts printed it was time form some body shopping. All the parts required multiple passes of filler primer and sanding, using a combination of stiff nail boards and sanding sponges. There’s no short cuts for this process, it’s just a lot of spraying and sanding, over and over. Sure there are some coatings you can use, and there’s ways to post process 3D prints with solvent. But all of those methods make the model look exactly like the processing, somewhat melted, or dipped in chocolate. I’d prefer to have more control than that.
For most of the parts it’s just two coats of filler primer with sanding in between. Occasionally there will be a gap that’s just too much for the filler primer, for those a small dab of spot putty does the trick. After going through that the parts are pretty smooth, then they get a single coat of regular primer. I use a darker grey primer for this to make sure I get good coverage. It’s the same reason I print in black PLA, the contrast of the underlying layers helps you see where you are with the current layers.
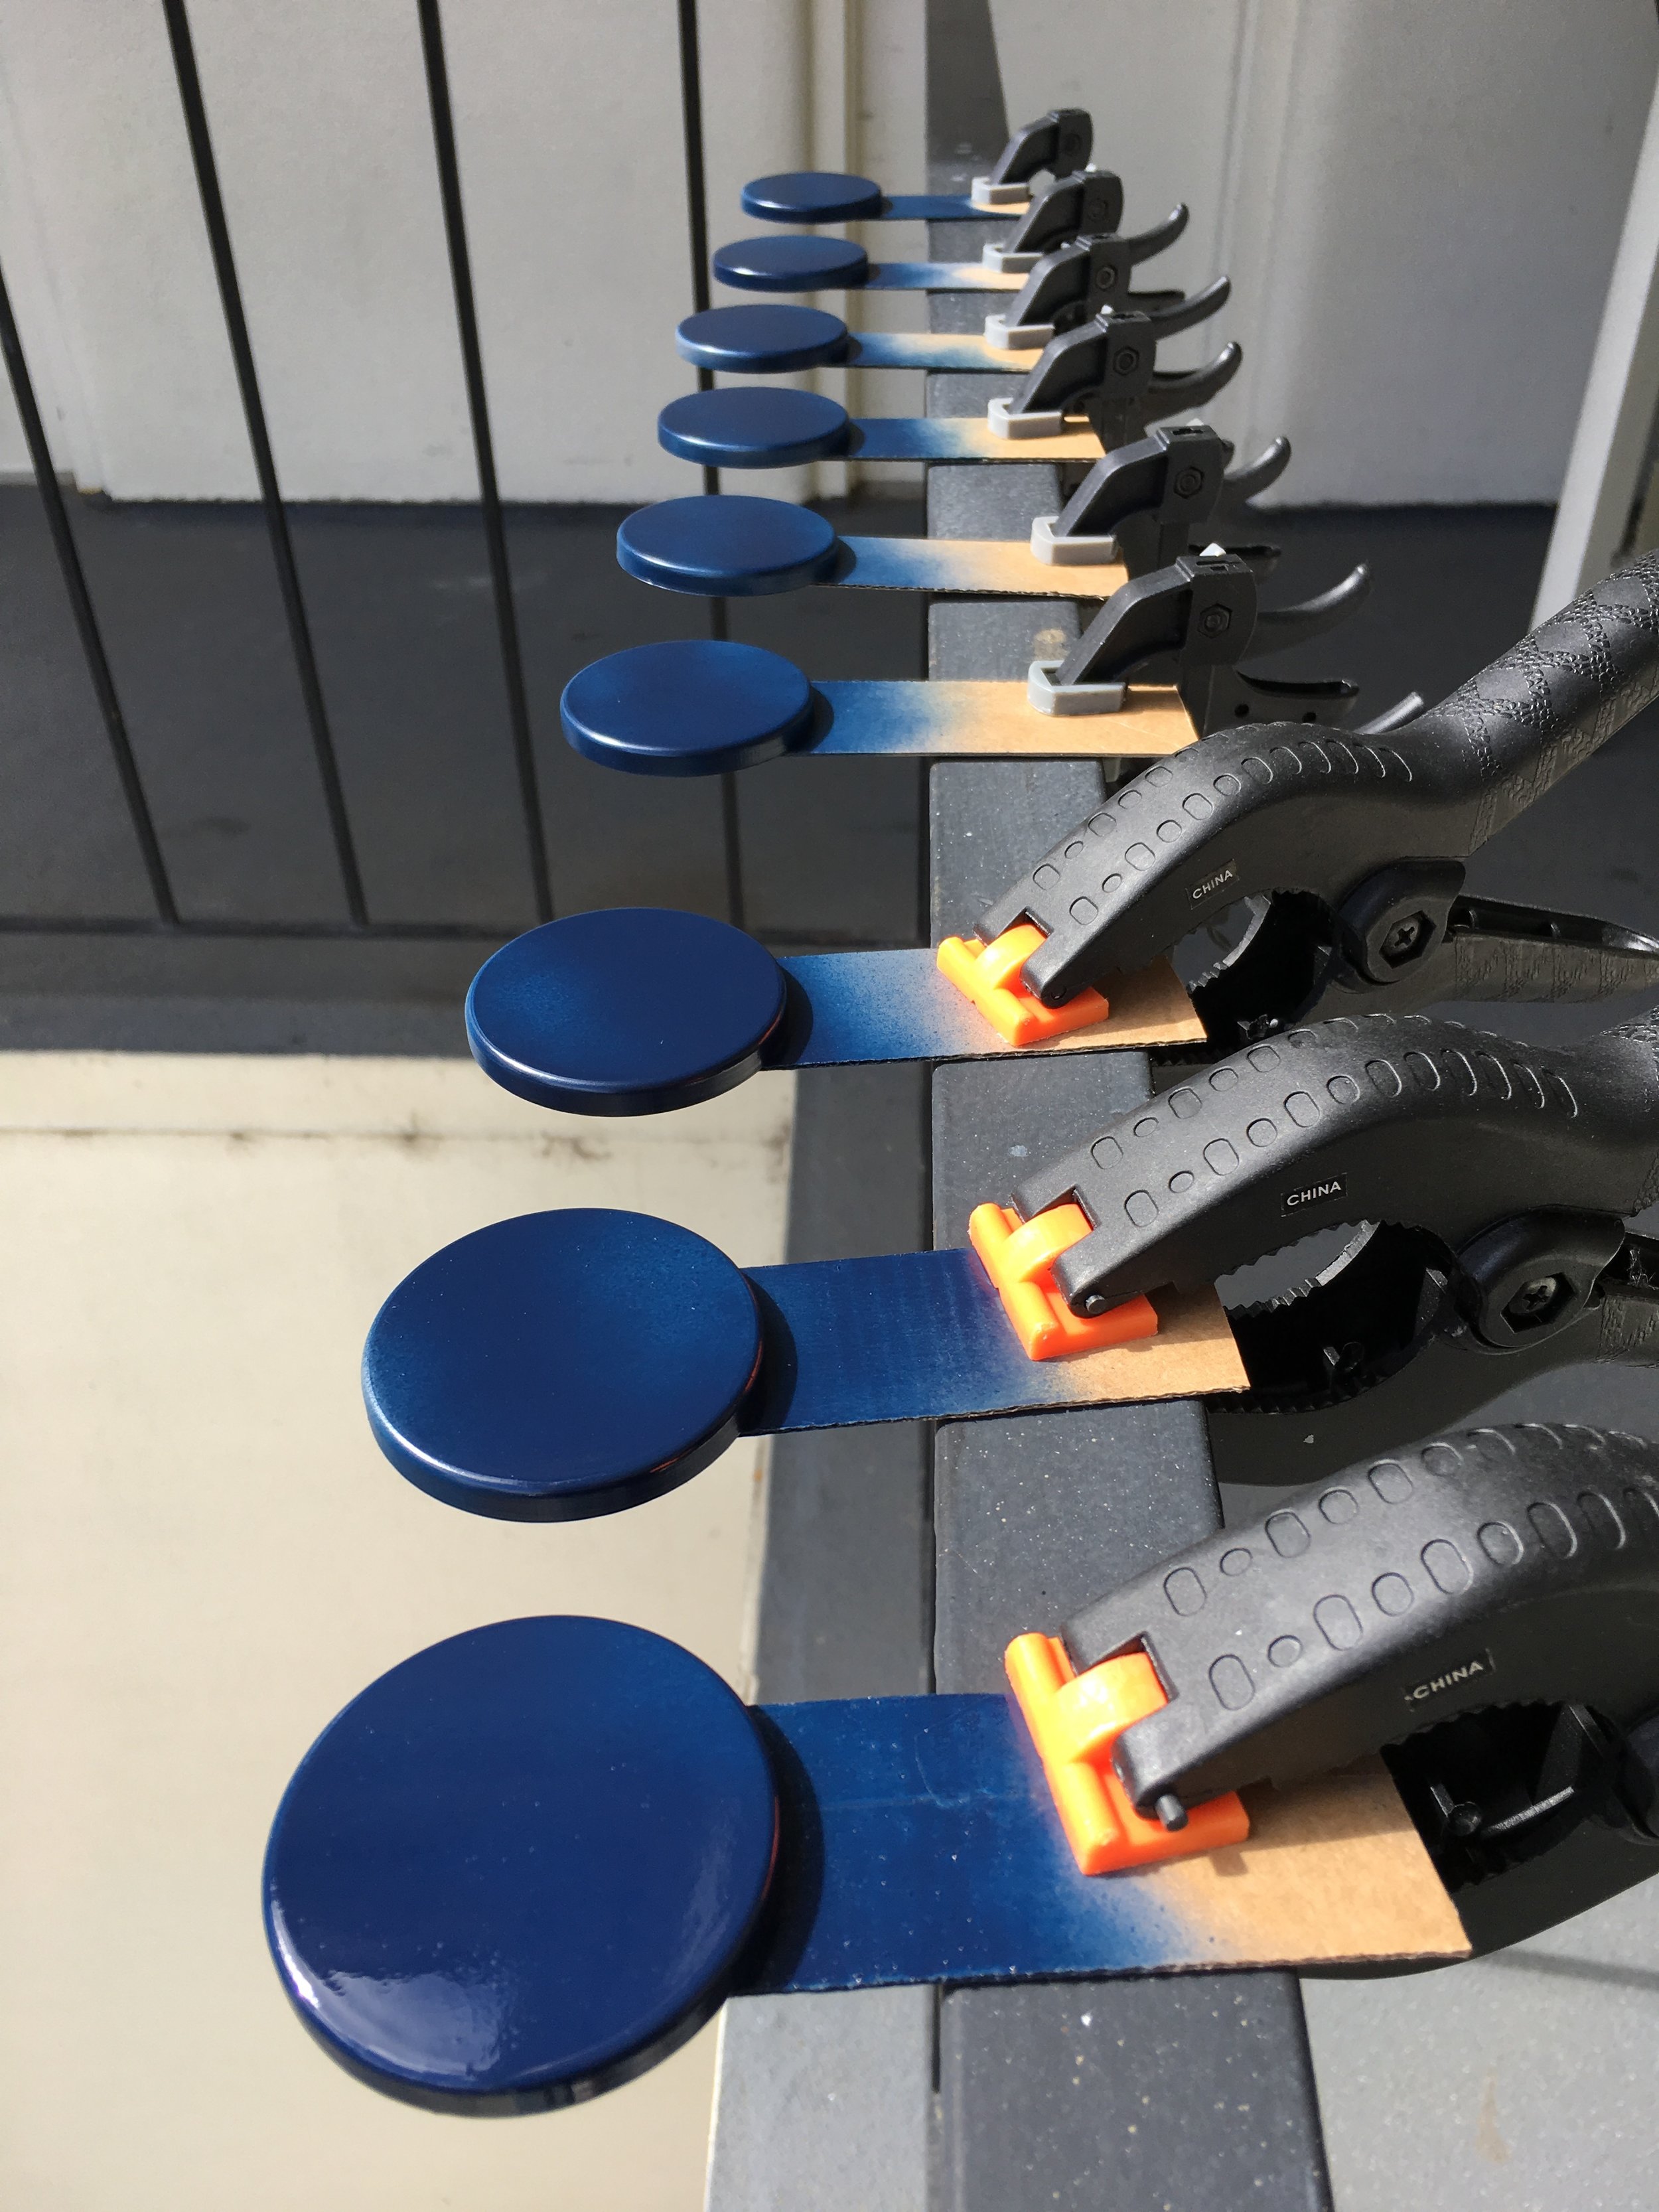
Now it’s time for paint. I used Rustoleum rattle cans for this, and it took a bit longer than expected because of the weather. My little studio doesn’t have very good ventilation, so I do my painting outside. I’ll usually attach parts to scrap cardboard for painting (and for priming too), this allows me to have a place to grip it, as well as a place to clamp it to my balcony railing out back (I’m on the second floor). But because I do this outside I have to careful about the weather, and coincidently while I was at this step it was cold, rainy and wet.
As you can see it was about this time I ran out of horizontal surfaces in my studio. I had parts everywhere drying, including on the print bed of my CR-10 printer. During the couple weeks it took to do all this I started trying to figure out how to do the compass printing. My first instinct was stenciling. So after bringing in a photo into Photoshop of the plaque I made some clean art of the pattern I wanted. The real plaques have a pretty intricate design, with double lines, I simplified it for appropriate scale. But even the simplified version was too detailed to cut a stencil from, even with a machine as capable as a Silhouette Cameo. My next thought was digital printing, but it was going to be too costly. I also considered water lift decals, and I went as far as to order the paper, but then I remembered the fine folks at StickerMule. I’ve been using StickerMule for years, making all manner of swag for both Nerds&Makers and our sister site BrickNerd. I sent them the design and requested 2” clear stickers with white printing.
As you can see the plan worked perfectly and they turned out great. With this task completed and all the parts painted (and giving a couple days to dry completely) it was time for assembly. Each base got four magnets glued into the back with CA glue and a drop of accelerator. Then the rings were attached with the stainless steel screws. For the numbers I decided to try UV glue and it worked great. If you haven’t used it before, the Bondic UV glue system is pretty nifty. You apply a clear viscous liquid to the parts, and cure it with the included UV light. The great thing is until you glue it you’re free to make and adjustments needed, or even remove it with alcohol and there’s no trace. Simply get everything just as you need it and then zap it with ultraviolet radiation (just don’t expect any super powers).
After all the numbers were attached it was simply a matter of gluing the pucks into the bases, a single dollop of E6000 was all that was needed for that step. By the way, E6000 is some seriously toxic stuff, containing tetrachloroethylene, which is an eye and respiratory irritant, take it seriously and use a respirator.
And after a couple days drying time they were done! I’m super happy with how they turned out, and I really hope my fellow guests aboard the Disney Wonder get a kick out of them. By the way, the screen caps you see above were from my live stream on Twitch. I did more than 80% of this project while streaming live, and you never know what I’ll be building next so give a follow and come hang out some time.